


Sunday, 31 January 2010
Create an Exploding 3D Fluid Text Effect
Posted by Tien Dung | Sunday, 31 January 2010 | Category:
3D
|
0
comments
Scene Concept
In the original concept this scene was meant to look differently but as I started simulations and rendered some test images I decided to simplify it a bit because it would take days to create what I really wanted to with 1-core 1,8GHz processor that I was working on that moment. Anyway, original idea was to create some text filled with paint that is slowly running out of each letter and flies away. I’ve ended up with wavy water exploding from each letter so it’s slightly different but still looks cool
A new scene
Open up 3ds Max. First let’s create some text so go to the Splines and look for Text. I suggest to use some bold and clear font because it will be much easier to create water pouring from the letters’ faces. Some good fonts include Arial, Helvetica, Futura, Adobe’s Myriad so choose one of them.
Text Setup
We’ll need three or more different objects for text. Spline from the previous step is just a beginning.- First one is just a flat text will Extrude applied to it that will be used to create particles in front of the actual letters (so place it like this on the scene).
- Second has Bevel applied to it and the outline set to five. We will use it as the border of each letter.
- The last one is a regular text with Bevel applied to it. This one will be the center part of each letter. (place it inside the second text object).
- At this point you can plan how should your text look like and add more layers if you want it to be different (for instance you can add another border or round some edges).

Placement
You should now have something similar to this scene on the image below. Place the second object inside first but let it stick out a bit and the third object in front of the first and the second.
Glu3D – Fluid Plug-in
To create a realstic fluid we’ll use Glu3D plug-in for 3ds Max. If you don’t own one you can download a demo version on 3daliens website. After installation restart 3ds Max and it should work. The last thing is to right-click somewhere in the 3ds Max’s toolbars and enable glu3D toolbar.Setting Up Particle Flow
Select the thinest word and apply a material with opacity set to 0 to it. After that go to Particle View (6). Create an Empty Flow, Birth Event and add in all the necessary elements like Position Object, Force, Shape, Age Test. At the end create pFlow -> Glu3D operator that should be now available for you. If not your plug-in doesn’t work and you should reinstall it or turn it on manually by going to Customize -> Plug-in Manager.
Particle Flow Forces
Create a wind and a drag by going to Space Wraps -> Forces in the top-right menu of your 3ds Max. The settings really depends on what you are going to do with this effect. If you don’t want to have as wavy water as mine just decrease turbulence a bit. My setting for wind are 0.05 for strength, 0.4 for turbulence, 0.4 for frequency and 0.5 for scale. In the drag’s settings I’ve only changed Linear Damping values from five to 25 for each axis.
Particle Flow Settings
Back to Particle View (6). I’ve prepared a screenshot that contains all the setting used there so just modify them. They are close to standard setting but we’ve increased a number of particles to 20,000 because Glu3D will need lots of them (maybe even more) to create a detailed fluid. We’ve also changed the emit stop parameter from 30 to 10 and that will make these 20,000 particles appear on the scene during first 10 frames of the animation. We’ve obviously added forces (drag and wind) to particle system and we’ve added our invisible text as a Particle Emitter. There’s also a Destination Directory parameter in pFlow -> Glu3D options. I suggest not to change it yet and I’ll explain what to do with it in the further part of this tutorial.
Other settings
Our scene should look like on the image below. Note how I’ve placed the wind. It’s rotated a bit upwards (like 10 degrees) because we don’t want particles to fly straight horizontally but rather fly off the surface first and than start to fly to the right.
Converting particles to Glu3D fluid particles
When I was starting to write this tutorial I didn’t know how to use particles from 3ds Max’s particle flow inside Glu3D and I found a short solution on 3Dalien’s forum which works fine. You can find the solution here: http://www.3daliens.com/glu3D/forum2/index.php?topic=574. Anyway, I’ve prepared the condensed version:- Click “Select destination” from the pFlow -> Glu3D options panel and select a folder to store your particle flow files.
- Create a Glu3D system but delete its emitter and press play button (or GO).
- Make sure some new files appeared in the destination folder and create a glu3d emitter.
- In the emitter’s options select source type as “import from PFLOW” and choose the directory you’ve recently created.
- Press play button.
- Press “Build Surface from the start of the playback range” button in the glu3D toolbar and you are done.

Materials
Material for borders of the letters is just VrayMtl with diffuse set to white.Second one for fluid is a bit more complicated. There are several different ways you can create water material so feel free to use your own material. My material looks like this on the image below.

Vray rendering engine setup
It’s a simple scene so I believe you can render it with any rendering engine with similar results but I prefer to use Vray. The settings are very close to the original ones but I’ve turned off default lights and used HDRI instead. I’ve got a little library of HDRI maps so I just picked one. You can download some free HDRI maps from the Internet and use them here if you don’t have any. Click on the screenshot to enlarge.
Rendering
At the end render your scene. I rendered only three letters at first with resolution set to 640×480px. Then I did the same with the next two letters and finally I rendered “.com” part of my image. Save your renders and alpha maps for them.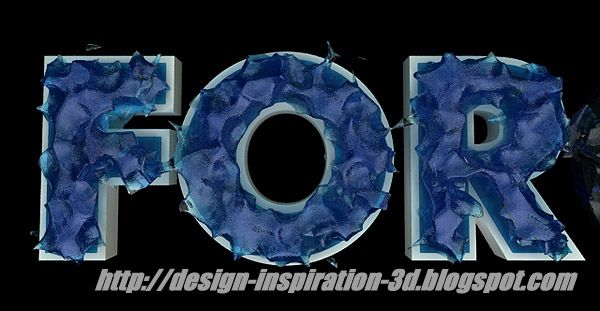
Background
Create a 1920×1200px Photoshop document and fill it with black with Paint Bucket Tool (G).
Compositing Fluid
Paste your renders into Photoshop and get rid of thier background. I used Alpha Maps to cut the letters out of the image. If you aren’t sure how to do it simply visit my previous tutorial about 3D space explosion and look for heading called “Cutting These Things Out” which explains entire process.Sky
Sky can be created by simply using Brush Tool (B) or Gradient Tool (G). For the colors use some light shades of blue like #8bcff6 or #439cdf. You can also download a clear sky image and blur it a lot by going to Filter -> Gaussian Blur… I’ll leave it up to you.
Water
Water was rendered in Vue Infinite but even if you don’t add any water to your image it will look good anyway.Adjustments
I made several adjustments by modifying color, contrast, brightness etc. of the image. There’s no one firm solution on how to do it so just play with the setting all the time. I hope that it won’t be a problem to adjust your image.Finishing Touches
At the end you can paint some clouds or add some text to it. To paint clouds I used free cloud brushes from here: http://redheadstock.deviantart.com/art/Clouds-II-Photoshop-Brushes-91356293 (by the way this is my favourite pack of all cloud brushes and I’m sure it will be useful for you as much as it’s useful for me also in other projects). Each cloud is on separate layer and the background clouds’ layer has its opacity set to 15%.
Subscribe to:
Comments (Atom)